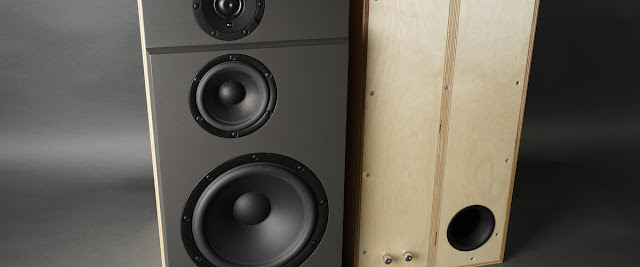
The 3-Way Classic Part 3.
Routing a lot of holes for speaker elements and ports is a tricky job.
It only takes one error and you might have to start all over again. That
is why I always try to get the most critical cuts done first. In this
case most of it went well, but not all. This post will partly be about when things don't turn out the way you planned.
The first slip up was the inner holes for the tweeters ending up a tad to small. I made them a bit larger freehand style. Not perfect but it doesn't show so no big deal.
The next problem was the recess for the 8 inch element. The router bit started to walk so the last hole ended up 12 mm at the end instead of 9 mm overall. I thought I had a new one inch bit, but I could not find it so I used an old one. I guess it had some grime on the shaft that made it walk. Frustrating, but fixable. I made the recess 12 mm overall on both speakers. I then took some 3 mm rubber cork gasket sheets and cut a gasket that will make the elements sit flush with the baffle even though the recess is 3 mm too deep. Far from perfect, but once again, it will not show.
The last error took a bit more elbow grease to fix. I initially planned to route the holes and flares for the ports in the baffle. It started out perfectly with a hole from the front halfway through the baffle with the inner diameter of the port tube. I followed it up with a similar hole from the back halfway through the baffle with the outer diameter of the port tube. So far so good, just a round-over to flare the whole. This is where I, for once, carried on without a test cut in some scrap wood. Take a look at the picture below and guess what happened with the front hole when the ball bearing guide went under the edge of the smaller hole!
This problem was not salvageable and it would show! I just had to make the hole bigger and try to find a port flare that would cover it up and still not extend over the edge of the baffle or the hole for the 8 inch element.
I had a really hard time finding such a port and the one I finally found was of quite lousy quality. Cheap casting, visible flash lines, you get the picture...
Someone suggested that I should sand it down and spray paint it black. But that is not how I usually work. I first sanded it down though, wet sanding. I started out with 340 grit, then 800 and finished it off by 1200. But I then moved on to Farécla G3 fine rubbing and I finally buffed it up with some Meguiars ScratchX 2.0. The picture below is a before and after comparison.
I used a router template guide and a couple of templates to reposition the holes and make them fit the port flares. The final result is not what I anticipated, but I think I can live with it. Lesson learned, never give up, at least as long as the slip up doesn't show!
MDF is not the best material for screws. I therefor usually back it with some plywood, at least around the elements. The baffles on this build are quite thick so I made some 2x2 cm "chips" out of 4 mm birch plywood. I then glued one of each behind each screw hole for the elements. Maybe a bit overkill but better safe than sorrow.
The next problem was when I was about to glue the baffles to the boxes. I usually use PVA glue on raw material. But I had painted the boxes white and it had to cover the front edge of the box, at least to some extent. I ended up gluing the baffles to the front edge using construction adhesive (black Casco SuperFix), and I used the same to fasten the ports. The good thing about this was an airtight bond between the baffles and the front edge. But I do not fully trust construction adhesive alone, so I glued additional fillets with PVA from the inside.
Black Valchromat isn't really black, it is more a dark grey color. I first applied two layers of oil to make it a bit darker. I finished it off with wax (Liberon) buffed with steel wool to a satin finish.
This marks the end of the third part about my 3-Way Classics. The next post will be about first measurements of the speakers...


