The DIY Music Streamer Part 2.
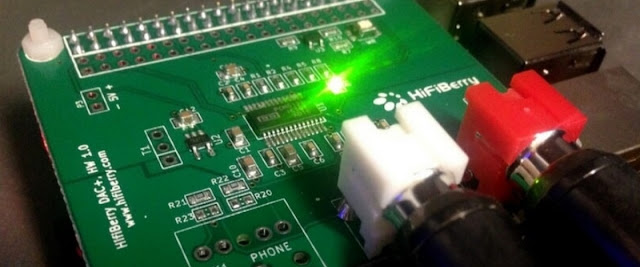
You can use the internal DAC and the analog phone jack or an external DAC. I will use the HiFiBerry DAC+ but there are other options too. Follow the instructions for how to mount it on the Raspberry Pi. Next step would be to download the Raspbian Lite disk image and flash it to a memory card using a software like Balena Etcher. Your memory card will now hold two partitions, the boot files are stored on the first one, which is formatted with the FAT file system. This means that it can be read on Windows, macOS, and Linux devices.
Mount the boot partition if you have to and create a file named "ssh" on the boot partition to enable ssh at boot. You will also find a file named "config.txt " on the boot partition, open it in a text editor and comment out the line "dtparam=audio=on" to disable the builtin DAC analog phone jack. The line should look like this:
#dtparam=audio=on
Enable your external DAC, you add the following line for the HiFiBerry DAC+
dtoverlay=hifiberry-dacplus
My whole "all" section actually looks like this:
[all]
gpu_mem=16
start_x=0
enable_uart=0
dtoverlay=pi3-disable-wifi
dtoverlay=pi3-disable-bt
dtoverlay=hifiberry-dacplus
It enables the HiFiBerry DAC+, setting the memory split, disabling Wi-Fi, Bluetooth and serial port etc. Some of this can be configured using raspi-config but I set it here to save some time later on.
Save the file, unmount the partition and eject the memory card. Put it in the Raspberry Pi, attach a network cable and power it up. It will boot with DHCP with "raspberrypi" as the default hostname. I always use DHCP even for servers but I assign a static lease for them in my router. Check your routers manual to figure out how to map a MAC address to a specific IP address. You can also use raspi-config to configure the network interface with a static IP address (but I prefer DHCP).
Open a terminal and use ssh to logon for the first time. I will use the address 192.168.1.10 in this example for this Raspberry Pi. The default username is "pi" and the default password is "raspberry". You connect with the following command:
ssh pi@192.168.1.10
Most commands will require elevated privileges and you therefor start most of your commands with "sudo" because it will give you super user powers. Start by updating the Raspbian package list and upgrade your software if needed.
sudo apt update
sudo apt upgrade
Then start the Raspbian configuration program.
sudo raspi-config
Change the default password for user "pi" to something only you know. There are a lot of settings, the ones I change are:
2 Network Options
Hostname: HiFiBerry
3 Boot Options
Wait for Network at Boot
7 Advanced Options
Expand Filesystem
Save, reboot and login again. Time to check our DAC/sound card.
aplay -l
Should output something like this:
**** List of PLAYBACK Hardware Devices ****
card 0: sndrpihifiberry [snd_rpi_hifiberry_dacplus], device 0: HiFiBerry DAC+ HiFi pcm512x-hifi-0 []
Subdevices: 1/1
Subdevice #0: subdevice #0
Great our Raspberry Pi recognizes our DAC. Start the ALSA Mixer next with the command:
sudo alsamixer
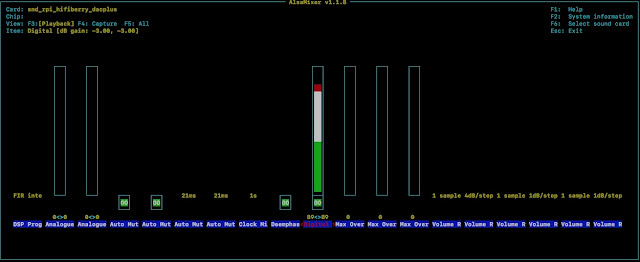
You will be met by a text based interface. Use F6 to select a sound card and F2 for additional information and so on (click images for higher resolution).
You can do a lot with this mixer so RTFM and search the Internet if you want to know more. I will keep it short and tell you what I do, without spending to much effort on why. I lower the Analog item to -6 dB and the Digital item to at least -3 dB. Make sure the Analogue Playback Boost item is down to 0 dB. This is what my ALSA Mixer looks like.
Save these settings globally with the following command:
sudo alsactl store
sudo nano /etc/asound.conf
It will open the text editor nano, add the following text:
pcm.!default {
type hw card 0
}
ctl.!default {
type hw card 0
}
Save and exit with Ctrl+X followed by Y.
Next up is shairport-sync, you install it with the following command:
sudo apt install shairport-sync
Shairport-sync got a slew of advanced settings but works pretty OK with just default values. I will come back to the settings file later. Enable the shairport-sync service and start it with the following commands:
sudo systemctl enable shairport-sync
sudo systemctl restart shairport-sync
Your Raspberry Pi should now show up as an AirPlay Receiver on the network (the hostname is used by default). Attach the HiFiBerry DAC+ to your amplifier and try it out. You can stop here if all you want is an AirPlay Receiver (but make sure to read along for some optimizations). You keep it updated in the future with the following commands:
sudo apt update
sudo apt upgrade
That was all for this post. The next post will be about adding support for Spotify.


