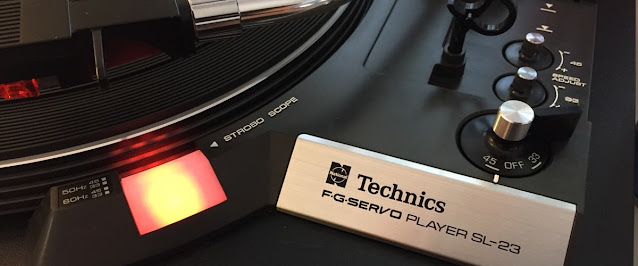
Technics SL-23 restore and revamp, Part 1.
Whenever I get som spare time I usually build a pair of speakers or an amplifier. The problem right now is that I am so pleased with my 3-Way Retro speakers and my Ultimate Integrate that I have a hard time motivating another build. Then what, another turntable? That is another hard sale since I already got a set of really nice turntables. My favourite is my Thorens TD-150 Mk2 with its original "Kugelarm" and custom plinth in blonde ash. The only problem is that it is fully manual. I therefor use a beautiful mint condition Philips GA 212 with optical auto stop as my daily driver. What else could I ask for? It would be nice with auto stop and return, servo control, strobe light, a clear and squarish dust cover in good condition. I also like belt drive and small footprint and an affordable price. What would fit the bill? Dual got plenty of candidates, Hitachi, Pioneer and Sanyo too. Availability is a problem except for the Duals but I finally settled on the legendary Technics SL-23.
A quick search and I found three in good condition so availability was not a problem. One was pretty close so I bought it for a resonable price. The problem was that I got no sound from it when I first hooked it upp. Back to the GA 212 and I got sound from both channels. Back to the SL-23 and I got a somewhat bad sound from one of the channels. My first reaction was broken tonearm cables. The seller was kind enough to split the cost for replacement cables. It would take some time until I actually had time to work on this turntable and the problem turned out to be the RCA-cables and it seems to ba a common problem with these tables, more about it later. I had to tear it apart anyway so why not restore it and even revamp it a bit.
The major problem with this kind of tables compared to classics like Thorens TD-150, with a floating chassis in a wooden plinth, is that these tables are much harder to take apart and make a new plinth for. I like the original look of the SL-23, it is very Technics, so why make a new plint? Mainly because I wanted something to do and I did not want to messup the original plint.
The table has to come apart before I can make a new plinth and it has to come apart because I want to inspect and service as much of the internals as possible and I also want to replace all electrolytic capacitors. Why replace them? These turntables are around 50 years old. The speed control seemed good on this one but replacing the electrolytes can't hurt and it will buy this table another 50 years.
A bit of a warning: These turntables are not meant to be taken apart easily and it is easy to messup. It should not be a problem if you are a decent maker with a decent set of tools. Please don't ruin a perfectly restorable turntable if you don't got the required skills or tools.
Flip the turntable over and open it up and it will look like this:
Remove rubber feet and loosen as much as possible like power supply and the ground plate covering the PCB where tonearm and RCA-cables are soldered. Note how everything is connected and desolder the tone arm cables before you do anything else. Don't event think about not desolder them because you will have to if you want to follow this guide and it will make life so much easier, trust me on this one.
I don't know if there is an easy way to get the auto stop mechanism off other than what I finally ended up doing. Look at the picture below, it is the tone arm axle. The auto stop mechanism is secured to it with a screw. Getting down and loosening the screw is a bit of a hazel but it is worth it because the auto stop mechanism can then easily be lifted off without having to adress the self-retaining washers. Make sure to make a mark on the axle and the mechanism before you loosen the screw so you can get back to the same position when you put it back again.
Another problem is a screw hidden under the strobo mark holding the top part in place. You have to get the strobo mark off in order to losen this screw. Applying some heat with an heat gun might helt loosening the glue but be careful.
The rest should be fairly easy and you should eventually end up with an empty plinth like this:


