Technics SL-23 restore and revamp, Part 4.

The veneer was quite delicate so I thought I better protect it for further work on the plint. Schellack is a great foundation so I gave it a couple of layers with a brush. I did not plan to do a full French polishing but I somehow just kept on adding layer after layer because it added a great warm hue to the wood. The result is far from perfect but I kind of want it that way because you can see its not fake veneer under some plastic cover. I can always come back later and add additional layers if I want, thats whats so great about schellack and nitro.

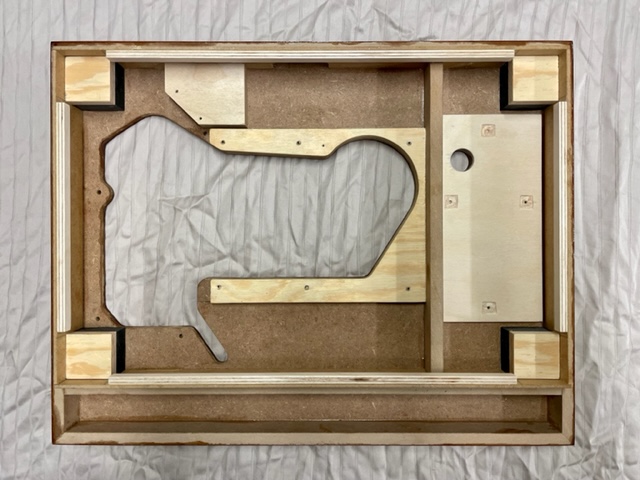
And this is what it look some from underneath with some additional parts. I added a piece of 3mm beech plywood under the PSU because I don't like to screw into MDF, especially if the screws are short.
I cut some pieces of aluminium to cover the lower piece of the plinth. The anodised aluminium gives it a fabricated feel but I think something black would have worked just as well or even better...

And this is what it looks like mounted together with the original bottom piece and feet:

I thought the feet deserved some additional attention so I 3D-printed some washers and mounted floor protectors to them. I punched holes in the floor protectors so I can dismount the feet if necessary.

I removed any glycerin from the mounting surface of the feet with some acetone and then glued the washers to them with contact cement.

Time to put everything together again. First the polished dust cover:

Next up was to fix the major problem with this turntable, the RCA-cable. The problem is the strain relief, it it quite aggressive and it eventually tears the cables off. My solution is to remove some material so that the U-shape is a bit more shallow. It will still provide enough strain relief without putting to much strain on the cables.

I also took the time to replace the original cables. The original RCA-connectors looked a bit sad and I hate black cables against white walls.

This is my solution, nothing fancy just a bit better:

Next up was all the mechanics and electronics, it went back in fairly smootly:

And the original bottom piece:

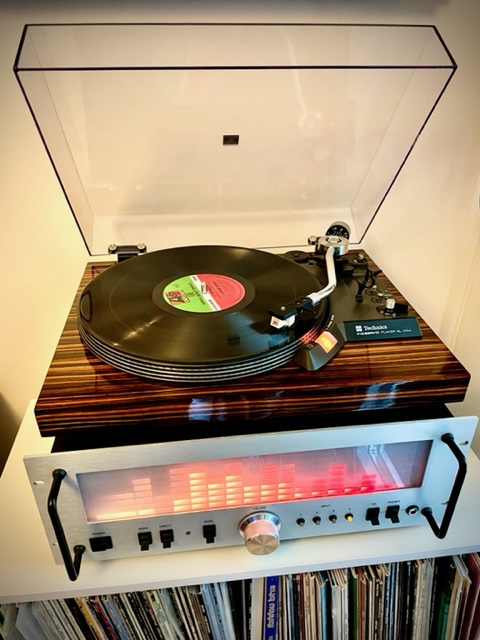
Vola, the final result! I can't tell you how pleased I am with the result. The plint came out just the way I wanted it, like a floating piece of ebony wood. The speed is rock solid and the sound is night and day from when I bought it. I attribute it to fully working RCA-cables but it had some kind of faint hiss in the background that is totally gone now. I had to adjust the auto-stop a bit to get it spot on. I am super happy with the functionality and the sound. A budget build but my perfect daily driver from now on.